


I am working like crazy on making a functional play room for the girl’s to enjoy and imagine and play and to keep their flipping toys in one flipping space instead of all over the flipping house. (I am not bitter 😉
They absolutely love dress up and have about every princess dress, doctor, vet, pirate costume you could think of (I love indulging dress up, their imaginations just go crazy). It was stored in a huge box, but all the girls did was rip thru the box looking for their desired accessory and leave a mess. Also, I think when the toys are out for them to look out, they play with them more?
The wooden clothing rack is mini-size. I chose the wooden dowel sizes so my 4 year old can reach the dresses on her own and re-hang them when she is done (we are working on that part) I fell in love with this rack though and want to make a real sized person one! The best part about this is they come in these sizes- NO cutting involved.
How to Make a Clothing Rack!
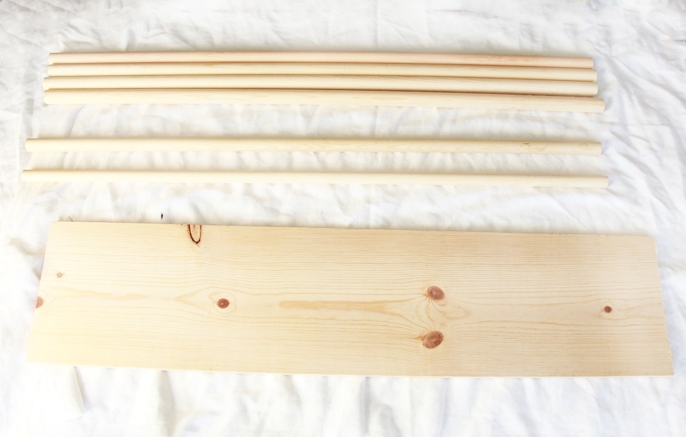
Materials:
We got all our wood at Home Depot, I am sure any home improvement store will have the sizes.
4- 48 inch (4 feet) 1.5 inch width wooden dowels (the photo shows 6 but we ended up changing our mind & not using the other)
1- 48 inch (4 feet) 1 inch width wooden dowels
1- 4 foot Pine board
Nail gun (not shown)
Another person other than yourself (not shown)
This is the totally easy, TEN MINUTE way to make a dress up clothing rack. Seriously, anyone can do this as long as you have a nail gun and a friend.
I don’t even have real instructions, go nuts with your nail gun and put together. (Just Kidding, kind of…)
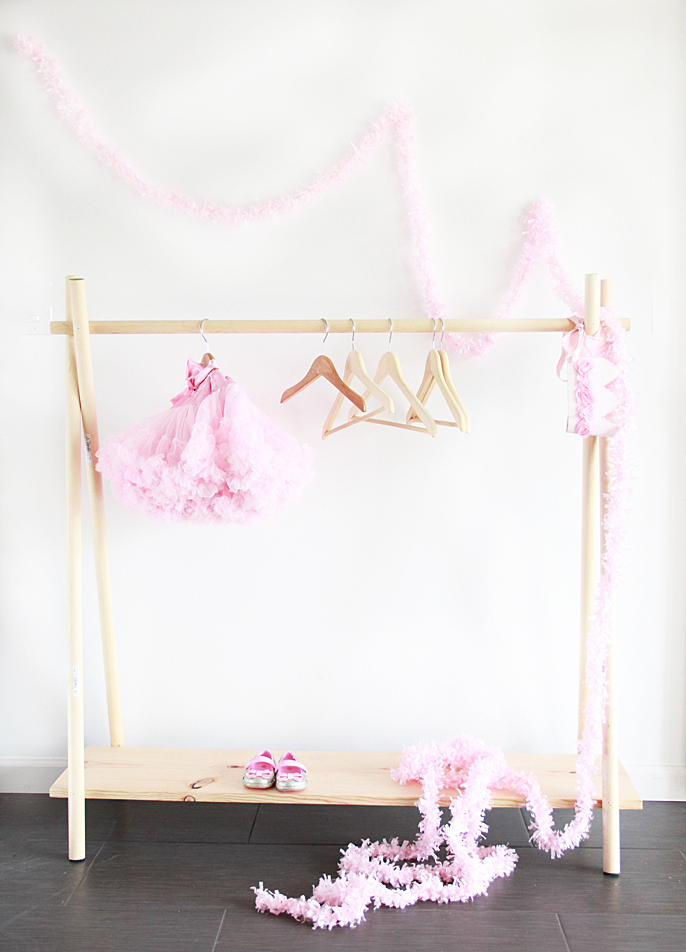
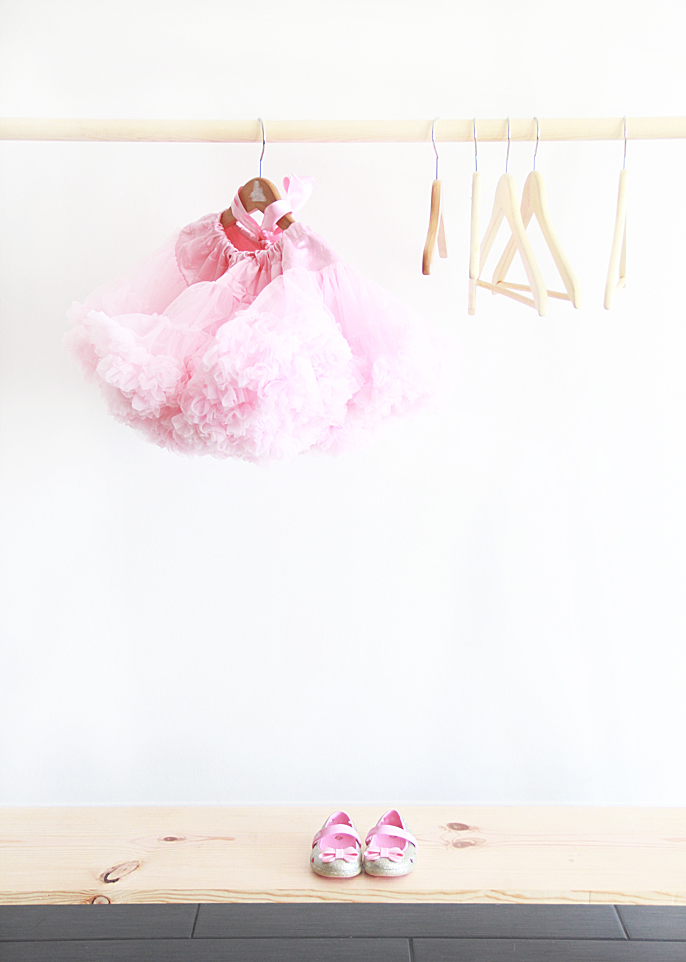
Here’s how it looks without any props (with the exception of my pink fringe garland from Tomkat Studio). I heart this garland. Anyhoo, my husband simply just put a crapload of nails in it… (I am a technical DIY-er if anything) (I was the one holding the wood in place)

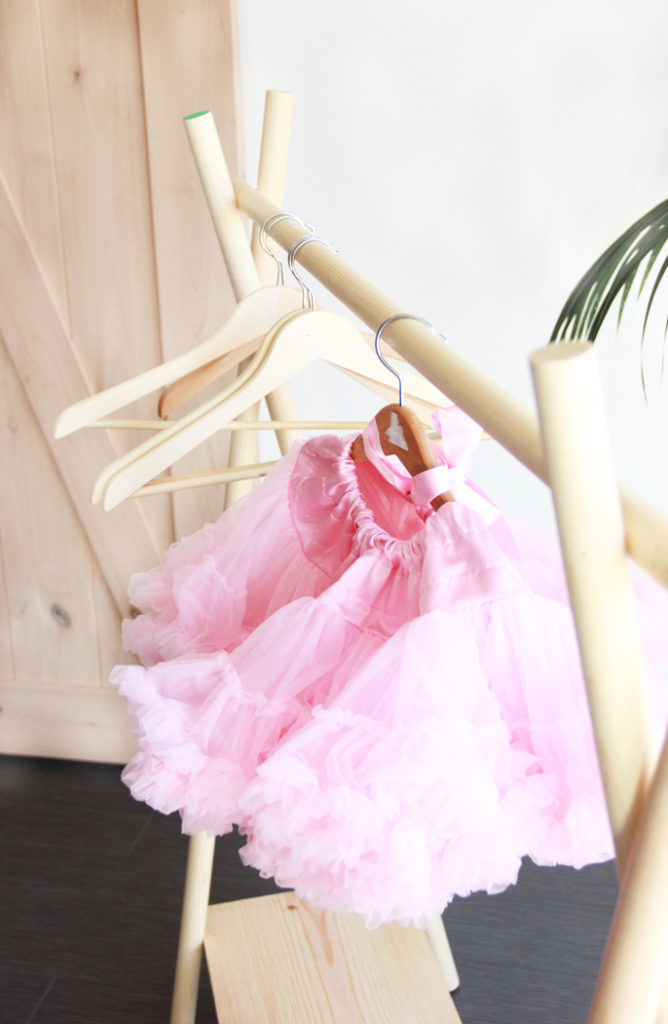
Make a criss-cross shape with the wider dowels. Two on each side. Nail the criss cross parts together. (also, we used multiple nails for each section, until it felt sturdy) To decide where we wanted to nail the sides, we put the skinnier dowel in and left 3 inches on top, to get this look: (I held all it together while Nick nailed it)

Then nail the skinny dowel to the criss cross shape:

Once both sides are up, you can nail the bottom piece (where we hold shoes) Technically, you no longer need the other person to hold the rack. The other person (me in this instance) can go grab an iced tea. (based on real life events)

If you remember from the diy material photo, we bought another wooden dowel, we wanted to add support in the back or on the sides. However, the rack was surprisingly sturdy as is, and since it was only holding the girl’s lightweight costumes, we decided to leave it at that. We also would have had to make cuts in the dowel to create the extra support. We may or may not have wanted to finish watching Pitch Perfect 2 at the time… (it was awesome)

I hate crocs. Until I met this pair. Hi, beautiful.

So, I love it as-is. But, the girl’s playroom will be colorful. Kalia picked out 4 pastel colors and when we do a full reveal, this rack will probably have some added color dips to it.


A Bubbly Life is on BlogLovin, Facebook, Twitter, Pinterest & Instagram– I would love for you to join me there!


I had a lot of trouble successfully nailing the dowels together. The nails seemed to deflect and bend off the second dowel after traveling through the first. Any tips/details on how to successfully join the dowels together with my nail gun? Surely I was doing something wrong!
this is exactly what I’m wanting for my boutique…how did it hold up and did you end up making an adult sized one?
Hi Courtney! I would suggest also using a tie around the top parts holding it together. Perhaps a leather strip or rope. We no longer have ours (my girls outgrew this stage 🙂 but we had it for a couple years. I did not make an adult one, we ended up doing a closet makeover and it was not necessary.
[…] 10. 10 Minutes Wooden Clothing Rack […]