


A common question I receive as a blogger is how to create roundup collages! Today, using Adobe Photoshop Elements 14, I will give you the steps to make your collages awesome. If you are not a blogger, these tips are still useful and great to create family collage photos. Photoshop Elements does have a very easy to use collage setting, but if you want more control over placement of your photos & some editing details- then these tips are for you!
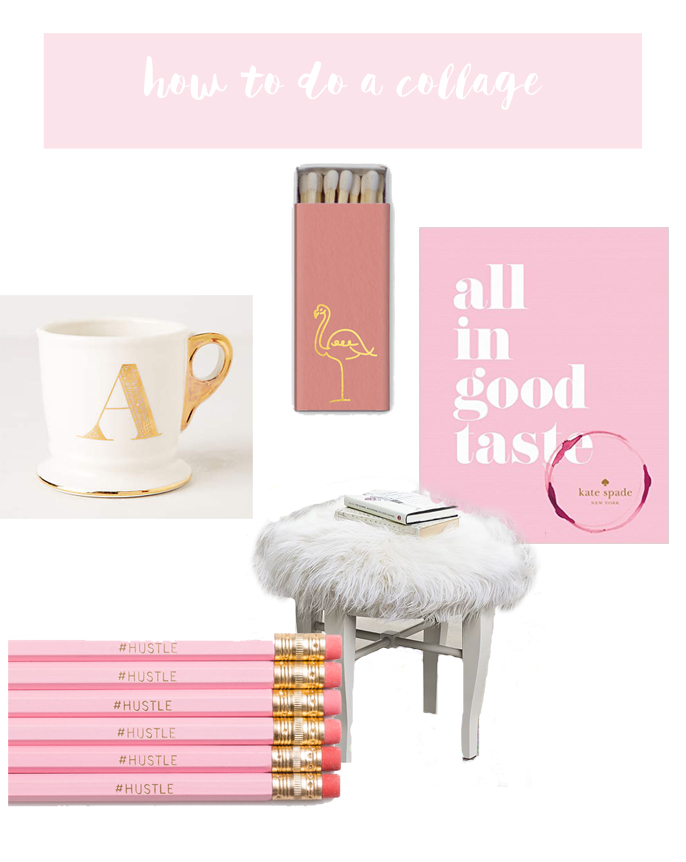
The examples above are a DIY Planter Roundup from my favorite bloggers & a Gift guide product collage.
First, pick all your products or projects and save an image of each one to a folder on your computer.
Once you pick them all, open them in Photoshop Elements 14 and
Create a New Blank File- Select File- New- Choose Preset Custom- And Pick your Size. I usually create a large one so I can resize down, I pick 1000 X 2000 here and I may resize as necessary later. (Blogger tip: Pinterest prefers longer images versus wider, make your product collages longer as a general rule of thumb)

Crop, Remove Background, Refine Edges for each product/roundup item.
Remove Background:
As a general rule I do not change other blogger’s photos except to resize to fit the collage. However, I do remove backgrounds for products when necessary and I typically use the magic eraser or background eraser for this. (there are multiple ways to remove backgrounds in Photoshop Elements)
Choose from tools and click on the background you want removed.

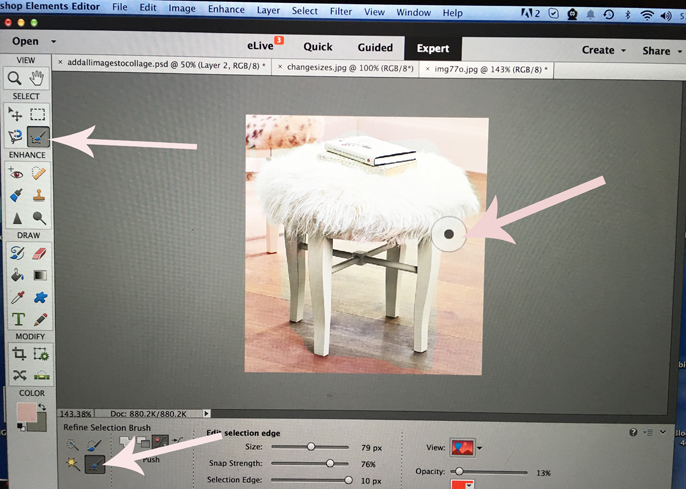
Refine Selection Brush: is a new tool for Photoshop Elements 14 and is very useful when needing to select fine edges like fur and hair. My example here is a furry stool. For family use, this comes in handy when you are combining images of people- you will get all their hair instead of it looking like they just got a bad haircut.
When I make my selection as normal, the selection tool will not get the fine edges of hair and the product copy to the collage will look funny.
Select Refine Edge, and simply brush it over the fur and your selection keeps those fine edges!
Repeat the steps above as necessary for each product you want included in the collage.
For more on refine edge, read here!
Copy and paste each image into the new blank file.
Using the arrows, move the products around to get your desired placement.
Change size: You may need to change the size of your photos while in collage. Use the move tool to select the product and reduce and enlarge as needed using the mouse. Click the green check mark when you reach your desired size.

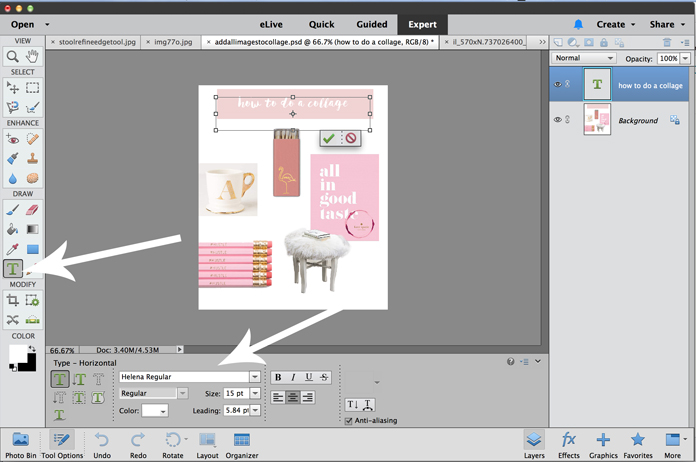
Add text/numbers. Pick your collage name and add text. You can also add numbers to each photo.
Crop the collage as needed.
 Save your file as a PSD (I like to save all layers in case I change my mind and want to move stuff around) . To upload to your blog or to print, merge layers and save as a JPG.
And there you have it, your own collage! If you are a blogger, this is useful for gift guides and roundups. As a Mom of two, I love them to make fun collages of my two girls!
Please comment or email if you have any questions!
Also, Adobe Photoshop Elements is on sale right now until December 1st for only $59.99, a savings of $40! Or do the bundle and get Photoshop Elements & Premiere Elements (video editing) for $89.99, a savings of $60!
* I am an ambassador for Photoshop Elements 14 and have been compensated for this post. All opinions are my own and thank you for supporting brands that support A Bubbly Life!

