One of the things I have learned since having children is their sh&*@&t is everywhere. Toys, clothes, shoes, underwear, cups, forks, diapers- it is everywhere. The only time it is NOT anywhere, is when you have to be somewhere and you need shoes, underwear, a shirt, etc… Then, it is is nowhere to be found.
One of our biggest problems is shoes. My husband got annoyed one day and threw them all in a basket. Which was better than the floor, but was a terrible idea because of course every shoe they want to wear is at the bottom of the basket.
So, that was a very long story to tell you I needed a shoe rack. But, it is a shoe rack that will be in view and display, not hidden in a closet or somewhere unseen. And I could not find a shoe rack I thought looked good enough, so I made one. Which is one of the many reasons I love to DIY.
How To Make A Wooden Shoe Rack
Materials:
Wood-
Sizes Needed– 2- 3 feet by 11 inches
2- 1 foot by 11 inches
(You can cut yourself or Home Depot will charge .50 cents a cut, or you can go on Superbowl Sunday and no one is there and they do it for free cuz they are so bored)
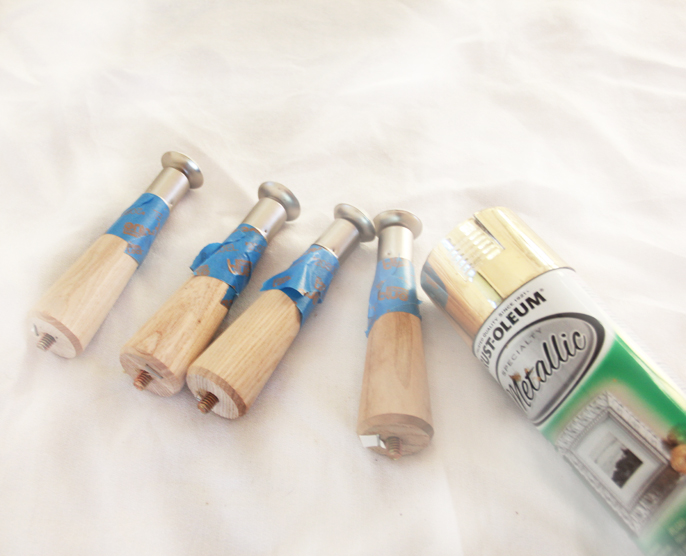
Table Legs- I used this style from Lowe’s
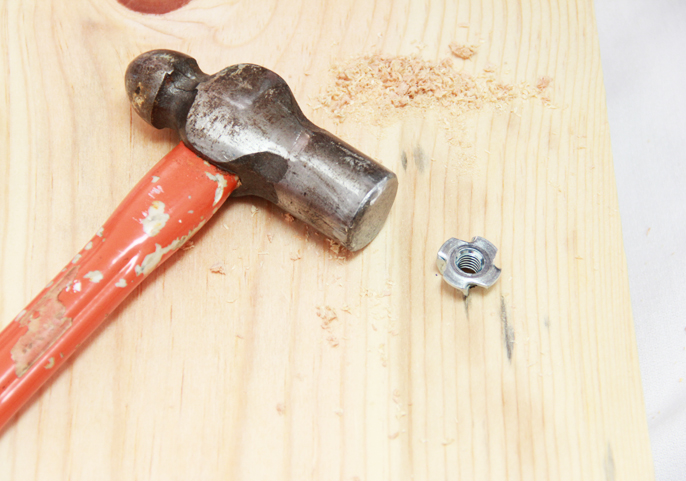
4- 3 prong T Nut (the size will have to match the size your table leg is)*
Nail Gun (new fav tool for my wood projects!)
*I went the T-Nut way to attach the table legs because it was very inexpensive to do so, however, it was not as sturdy as I would like and I added glue to the T nut to better attach to the wood. The glue fixed the problem. But, if I was to make a bigger shelf for something heavy, I would use plates to install the table legs instead.
Optional:
I spray painted the bottoms gold. Because gold.
How to Install The Table Legs:
Measure and mark off where you want the legs. Drill four holes into the wood.
Surround T nut in glue and put in the wood. Hammer the T nut in.
Screw the table leg into the T nut.
And you have a new shoe rack with a little midcentury modern flair!
And, because I like to keep it real around here, here is a not styled shot of how we use it:
3 things to notice here:
1) Colette turned 2 last month and I have not erased the message.
2) On the bottom shelf are THREE mismatched flip flops of Kalia’s. Flip flops in AZ are like socks you put in the dryer. What in the world happens to them!?
3) There are none of my beautiful shoes on the rack. Because I am lucky if I wear a heel or wedge once a month since having the girls. (love them though, I just really love & miss shoes too 😉


[…] Image credit goes to A Bubbly Life. […]
[…] abubblylife […]