I wrote the idea down in my notebook about 5 months ago, but I was so busy with Kalia’s party DIYs, that anything not for the party was put away for a later time.
I hope you enjoy it because I have many pages in that notebook filled (and lots of work to do!)
How to Make Your Own Ombre Cork Board DIY:
Materials:
Cork Board*
Gold Spray Paint (Optional)
Ruler
Painter’s Tape
Craft Paint in Same Color Family**
Mini Roller Brush
Small Foam Brush
* I scored my cork board at the thrift store for $2, they retail for about $15. I see cork boards nearly every thrift visit, so give it a shot 😉 ** It is very easy to pick your color palette at the craft store. All colors are lined up from lightest to darkest- pick the amount of colors you want (I chose 4) from the line up.
I chose to spray paint the wooden border gold (Well, my husband spray painted it since I am pregnant), I thought it would give the pink more of a pop!
Directions:
– Measure the cork board area you are painting. My cork board was a standard size which was 22.5 inches. Since I chose 4 colors, each color portion had to be the annoying measurement of 5.625 (I would have preferred an easier number to find on my straight edge!)
– I marked off the distance and length with the ruler using chalk (easy to wipe off!)
– Now, you are ready to paint!
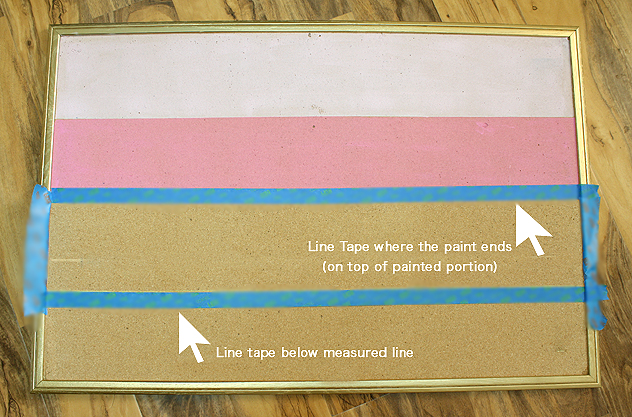
– Line the painter’s tape up to your chalkboard line (and you may want to add some tape to protect the gold sides, see pic below)
– Using the roller brush, paint the inside of the taped area. Using the mini foam brush, touch up any areas the roller did not cover.
– Remove painter’s tape while it is wet (immediately after painting) in the direction of the painted area.
– Let completely dry because you will need to put the painter’s tape directly on the painted area to do the next color, as seen below:
– Repeat with all colors and you are done.
It sounds complicated, but it is so very easy! As long as you press the tape firmly down and immediately remove after painting, you will get crisp, smooth lines!
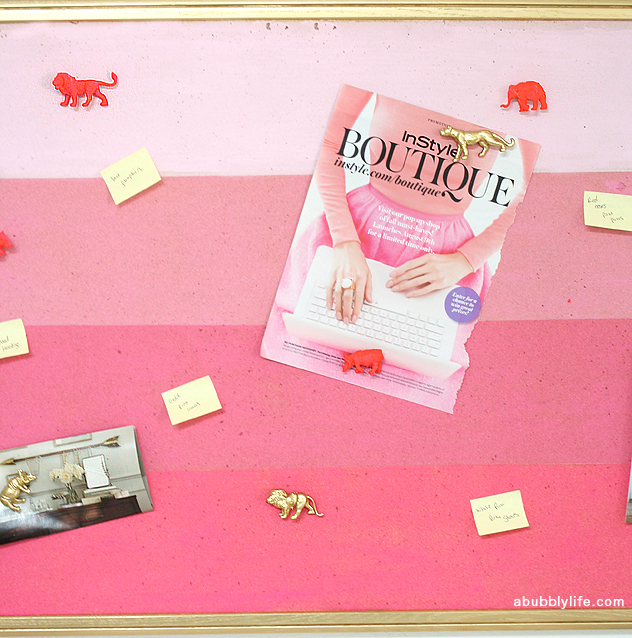
A couple peeks of it in my office (and I love it!)
A close up so you can check out the crisp lines! The post it notes are a bit blurred in the picture- those are random moments of inspiration that I cannot give away just yet 😉
Remember my neon animal pushpin diy? Well, I had hubby spray paint them hot pink and gold to match!
The cork board is new, so I do not have much “corked” My goal is not to clutter it a ton, so I can see the pink ombre effect!


[…] Fuente imágenes […]
I love this! I’m going to try it, would look great in my home office. Thanks for sharing xo